Place your promotion here


In stock
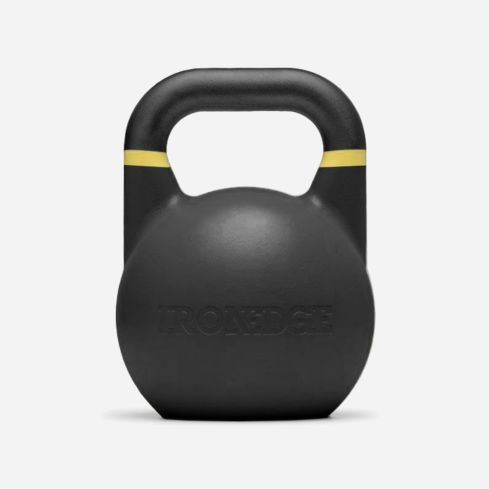
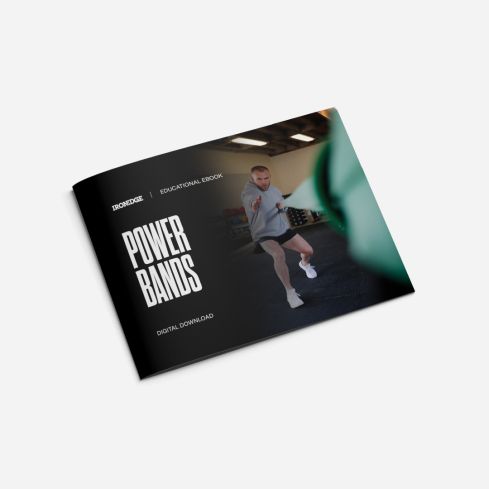
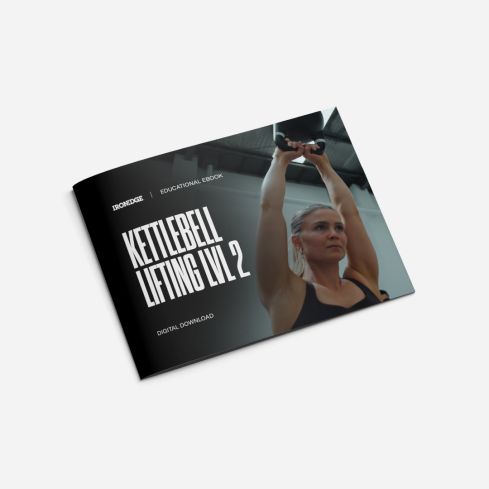
Kettlebell Lifting Level 1 - EBook
$15
Product Description
THE AIMS OF THE IRON EDGE LEVEL 1 KETTLEBELL EBOOK ARE TO:
-
Teach you the fundamental skills you need to use your kettlebells safely and effectively
-
Teach you how teach others to use kettlebells safely and effectively
- Teach you how to identify common mistakes in kettlebell lifting and give you the skills to correct these
- Give you information on basic programming for kettlebell training using the kettlebell lifts and positions taught in the workshop
EXERCISES COVERED:
- kettlebell deadlift
- around teh body pass
- figure of eight
- tactical lunge
- two are swing
- one arm swing
- kettlebell sport swing
- alternating swing
- rack position
- clean
- overhead lockout position
- overhead press
EXAMPLE
RACK POSITION
INTRODUCTION
Rack position (holding the kettlebell at your chest) is a fundamental of kettlebell lifting and will allow you to do a range of exercises, from simple rack squats and lunges through to overhead presses and more complex lifts such as jerks. Due to the kettlebell’s displaced centre of mass and odd shape, it is racked in a very different position from a barbell and must be racked in a particular manner for safety
MOVEMENT ANALYSIS SCREENS
Hip flexor flexibility (lunge stretch)
SETUP
-
Beginners can pick the kettlebell up in one hand and use the other hand to roll the kettlebell around the wrist so the body of the bell comes to rest in a “V” between the biceps and forearm
- More advanced lifters can clean the kettlebell into rack position
EXECUTION
- The handle should sit diagonally across the palm with one corner between the webbing of thumb and forefinger and the other side of the handle locked in on the forearm
- The pressure of the handle should sit on the heel of the hand
- The body of the kettlebell should sit in a “V” made by the forearm and biceps
- The hand should be roughly in line with the midline of the body, and should be positioned medially to the elbow
- The elbow should be in contact with the body (ideally the iliac crest). If this isn’t possible, as much upper arm contact with the body as possible
- The legs should be locked (or at anatomical lockout for those who are hypermobile)
- Some glute activation is required in rack to protect the lower back, however maximal tension in the glutes isn’t necessary
- The weight of the kettlebell should be largely supported by the lower body and should sit directly over the hip and heel
TEACHING POINTS
- A neutral wrist should be able to be maintained without activating the forearm flexors ie. the wrist should be relaxed
- To check whether the handle is too high on the hand, check for a gap between the forearm and handle – if you can slide your hand down between the forearm and bell handle, hand sliding perpendicular to the wrist, the handle is sitting too high
- The forearm and biceps should support the body of the bell evenly; the weight of the bell should not rest entirely on the forearm
- The hand should not pass outside the armpit or shoulder and should never be positioned laterally to the elbow
- The hand doesn’t need to touch the body and the palm should not be facing the body (having the palm facing between about 90-120 degrees from the body is good)
- In order to get the hips under the bell you may need to push them forward slightly, and have a slightly hyperextended lumbar spine, however you do not want a large amount of hyperexten- sion and there certainly shouldn’t be any pain or discomfort in the lower back in this position
- You can test the stability of the kettlebell by placing downward pressure on the body of the bell – if it feels stable rack position is prob- ably good, if it feels like it’s going to be pulled out to the front or side rack position needs to be adjusted
1. Peace of Mind
With over 500,000 satisfied customers, Iron Edge is Australia's No.1 high performance strength training brand. We've been fitting out elite high performance gyms for the likes of Collingwood Football Club and the Australian Defence Forces for years. We know what you need and what you don't. Our products are constantly being tried, tested and improved to be the best they can be. And we stand behind them accordingly.
2. Product Range
Iron Edge has one of the biggest ranges of high performance training equipment available in Australia. From Nike Romaleos weightlifting shoes, through to kettlebells, Power Bands and weightlifting equipment. In all we stock 100’s of different products at our warehouse facility in Melbourne so you'll always be able to get what you want and, most importantly, when you need it. That's why Iron Edge is the choice of Australia's best athletes, coaches and gyms. And why anything else is just compromise.
3. Engineering
At Iron Edge we employ experienced and qualified engineers to design, test and then source the best manufacturers of all our equipment. Up until 2017 we manufactured in-house, but market pressures forced us to move manufacturing overseas. However we weren’t going to compromise on the quality and structural integrity of our products, so after rigorous research, we’ve been able to partner with some of the industry’s best and most experienced equipment manufacturers. In many ways they are more advanced and sophisticated than our in-house work shop, so you can be assured that the quality of all our products meet the same high standards and are worthy of the Iron Edge brand.
4. Expertise
When you promise 'serious training' you have to back it up. Fortunately we do, drawing on our extensive experience dealing with Australia's best coaches, athletes, sports scientists and exercise physiologists. It's enabled Iron Edge to be one of Australia's leading authorities in high performance strength training- and with an educational arm of the business comprised of over ten certified courses launching soon, we plan on increasing the industry standard across the board.
5. No 'BS' Guarantee
We don't just say our products are the best available. We back it up with an industry leading guarantee. That means if your Iron Edge equipment is faulty or fails to deliver on its promise we will replace it. Conditions do apply.
6. TradePass
TradePass is more than just a FREE discount pass for fitness industry professionals. It entitles holders to unique offers based on their industry role plus event invitations. It's available to selected gyms, personal trainers, exercise physiologists, exercise scientists, sporting organisations, osteopaths, chiropractors, physiotherapists, the ADF, police, fire fighters, ambulance and Crossfit affiliates. You just need a relevant fitness certificate, ABN (or defence email address for ADF members). Click here for details.
7. Daily Dispatch
Most orders will ship from our warehouse SAME DAY (Monday- Friday) if place before 11am.
Though larger palletised orders are likely to take longer.
Details on Australia wide delivery times can be found on our Shipping Information page
 Massage Ball - Double Previous
Product Description
THE AIMS OF THE IRON EDGE LEVEL 1 KETTLEBELL EBOOK ARE TO:
-
Teach you the fundamental skills you need to use your kettlebells safely and effectively
-
Teach you how teach others to use kettlebells safely and effectively
- Teach you how to identify common mistakes in kettlebell lifting and give you the skills to correct these
- Give you information on basic programming for kettlebell training using the kettlebell lifts and positions taught in the workshop
EXERCISES COVERED:
- kettlebell deadlift
- around teh body pass
- figure of eight
- tactical lunge
- two are swing
- one arm swing
- kettlebell sport swing
- alternating swing
- rack position
- clean
- overhead lockout position
- overhead press
EXAMPLE
RACK POSITION
INTRODUCTION
Rack position (holding the kettlebell at your chest) is a fundamental of kettlebell lifting and will allow you to do a range of exercises, from simple rack squats and lunges through to overhead presses and more complex lifts such as jerks. Due to the kettlebell’s displaced centre of mass and odd shape, it is racked in a very different position from a barbell and must be racked in a particular manner for safety
MOVEMENT ANALYSIS SCREENS
Hip flexor flexibility (lunge stretch)
SETUP
-
Beginners can pick the kettlebell up in one hand and use the other hand to roll the kettlebell around the wrist so the body of the bell comes to rest in a “V” between the biceps and forearm
- More advanced lifters can clean the kettlebell into rack position
EXECUTION
- The handle should sit diagonally across the palm with one corner between the webbing of thumb and forefinger and the other side of the handle locked in on the forearm
- The pressure of the handle should sit on the heel of the hand
- The body of the kettlebell should sit in a “V” made by the forearm and biceps
- The hand should be roughly in line with the midline of the body, and should be positioned medially to the elbow
- The elbow should be in contact with the body (ideally the iliac crest). If this isn’t possible, as much upper arm contact with the body as possible
- The legs should be locked (or at anatomical lockout for those who are hypermobile)
- Some glute activation is required in rack to protect the lower back, however maximal tension in the glutes isn’t necessary
- The weight of the kettlebell should be largely supported by the lower body and should sit directly over the hip and heel
TEACHING POINTS
- A neutral wrist should be able to be maintained without activating the forearm flexors ie. the wrist should be relaxed
- To check whether the handle is too high on the hand, check for a gap between the forearm and handle – if you can slide your hand down between the forearm and bell handle, hand sliding perpendicular to the wrist, the handle is sitting too high
- The forearm and biceps should support the body of the bell evenly; the weight of the bell should not rest entirely on the forearm
- The hand should not pass outside the armpit or shoulder and should never be positioned laterally to the elbow
- The hand doesn’t need to touch the body and the palm should not be facing the body (having the palm facing between about 90-120 degrees from the body is good)
- In order to get the hips under the bell you may need to push them forward slightly, and have a slightly hyperextended lumbar spine, however you do not want a large amount of hyperexten- sion and there certainly shouldn’t be any pain or discomfort in the lower back in this position
- You can test the stability of the kettlebell by placing downward pressure on the body of the bell – if it feels stable rack position is prob- ably good, if it feels like it’s going to be pulled out to the front or side rack position needs to be adjusted
You Might Also Like


Related Products